By: Gracie Swind, Managing Editor
Here in the states, November means it’s time to welcome in the holiday season. While many of us are gearing up for Thanksgiving and Christmas in the United States, international students are returning to their home countries for their own unique holiday celebrations.
This year, we wanted to put a spotlight on the holiday season that is celebrated in countries all around the world. One of the best parts of the holiday season is the food, so we’ve asked the international students and professors whose cultures and countries are represented here to share a recipe of one of their favorite traditional dishes.
Ireland:
Across the pond, Ireland celebrates many of the same holidays as the United States.
“Christmas Day…is the pinnacle moment of the Irish Christmas season, which runs from December 8th to January 6th [and is known as the Feast of Epiphany],” said Dr. Pádraig Lawlor, Assistant Professor of History at Saint Leo University and an Irish native. “The night before, Christmas Eve, is just as important as Christmas day for the Irish people. … Just like Christmas Day in the United States, this day is celebrated with loved ones around copious amount of food and drink. It’s a time of merriment and festivity. One in which people relax and reflect on what matters: their family and loved ones.”
In addition to the staple meats of turkey and ham, Irish holiday dishes tend to incorporate lots of hearty vegetables, including potatoes, carrots, parsnips, and brussels sprouts.
According to Dr. Lawlor, “Christmas pudding, mince pie, and Christmas cakes are all big hits too.” One such Irish Christmas dessert is mince pie, which Dr. Lawlor lovingly describes as being “small flakey pockets of fruity bliss.”
In addition to being a tasty holiday treat, mince pies carry a cultural significance in Ireland. “In the 17th century, the pie was associated with supposed Catholic ‘idolatry,’” said Dr. Lawlor. “So much so that during the English Civil Wars (1639-1649), humble mince pie was frowned on by the Puritan authorities. It became a symbol of Catholic food and soon became popular in Ireland because of its place in Catholic culture.”
“Each pie is filled with boozy fruit (usually a touch of brandy), citrus and sweetness,” he explained. “Ever since I moved to the US in 2014, I’ve had to rely upon my own homemade recipe because they’re difficult to find in stores. When I have found them in stores, they are just not the same. The kitchen is our home is a place of experimentation around the holiday season!”
Dr. Lawlor has been kind enough to provide his family recipe for mince pies, and we invite anyone to try making their own mince pies this holiday season.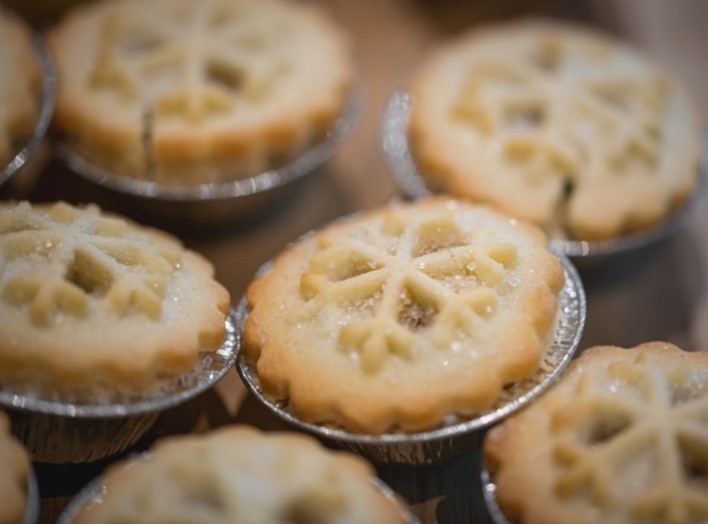
Mince Pie Recipe:
Serving: 15 small pies
Ingredients:
1 ⅓ Cup (175g) plain flour
8 Tbsp butter, cold and cubed preferably*
2 Tbsp icing sugar
1 egg yolk
2 Tbsp water
Pinch of salt
Mince Meat**
3 tablespoons brandy (cognac)***
Instructions:
- Place flour, butter and icing sugar and salt in a food processor. Pulse until fine crumbs form.
- Mix together the egg yolks and water and add to the dry ingredients.
- Pulse until a dough forms, around 10 seconds.
- Wrap the pastry in cling wrap and refrigerate for 30 minutes
- Roll on a floured surface to the fit your pie dish. I recommend around ¼ inch thickness
- Take a round cutter (around 3 inches) and cut out your circles.
- Place into a cupcake tin
- Fill with your mincemeat filling, around 3/4 of the way
- Brush the edge of the pastry with egg wash and lay on another round pastry on top
- Seal the 2 pieces of pastry together with a fork. this keeps the filling and juices
- Bake at 400F for 15-20 minutes or until golden brown
- Dust with icing sugar. Serve warm
- Add an additional loop to pants due to eating all 15 pies
Notes:
* Kerry Gold Butter is recommended as Irish butter has higher fat content and works better.
** Can be store bought – please note this is fruit, not ground beef!
Jamaica:
Many of Saint Leo’s students hail from Jamaica and the Bahamas and will be returning home for the holiday season. Tayhana Taylor, a freshmen Accounting major and the World News Page Editor-in-Training, will find herself heading home to Jamaica come the end of November.
“Christmas is my favorite holiday because it’s the only holiday my family celebrates together as a group, so that makes me really happy to just catch up with everyone, eat and have a belly full of laughter,” Taylor said. In Jamaica, other important holidays include New Years Day and Boxing Day, which happen on January 1 and September 26 respectively.
“Oxtail and rice and peas as a mouth-watering dish that explodes with flavors once you take that first bite of the meat and that first spoon of rice and peas,” Taylor explained. “There is also a traditional Christmas drink made from a plant called ‘sorrel’.”
Taylor has provided a recipe for Jamaica’s traditional, sorrel Christmas drink and encourages anyone to try it.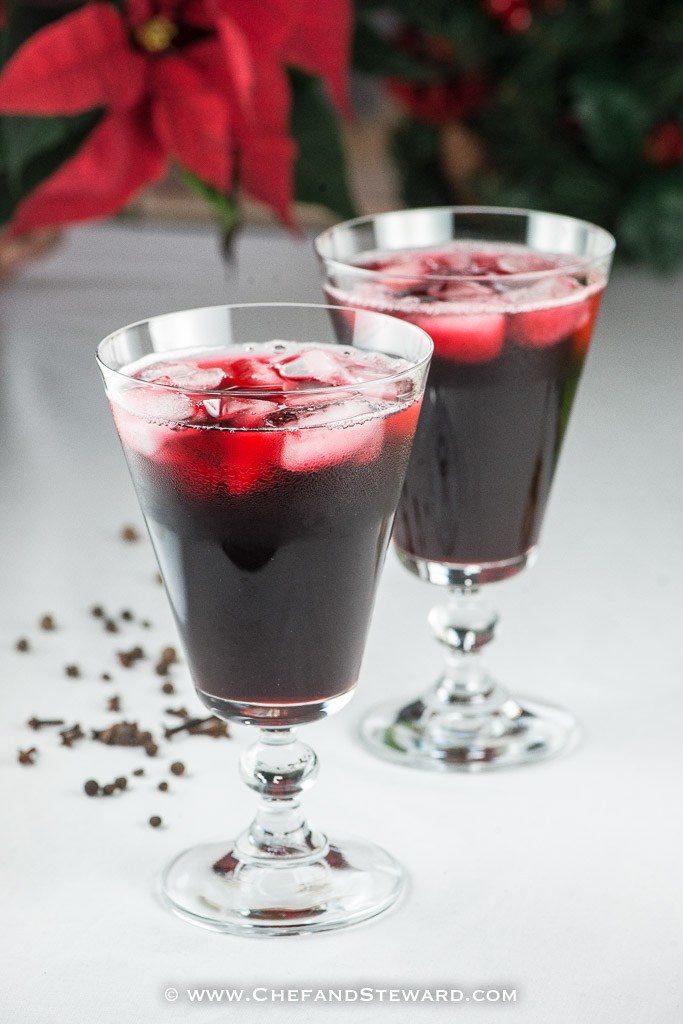
Jamaican Sorrel Drink Recipe:
– 4 cups Dried Sorrel (also called the Jamaican Hibiscus plant)
– 3 cubes of Ginger
– 8 cups of water
- Combine ingredients.
- Add Granulated Sugar to taste.
- Add Wray and Nephew White rum to taste (optional).
Mexico:
South of the United States’ border, Mexico has its own unique collection of holiday traditions and holidays. November 1 and 2 kick off the Mexican holiday season with El Dia de los Muertos, also known as the Day of the Dead.
“We celebrate the death by setting up a communion table or ‘altar’ in Spanish. We display the favorite foods of the family members that are death, can be a grandparent that died last year, and great great great grandparents too,” explained Mariana Navarrete, a sophomore Global Studies major and psychology minor. “The ultimate goal is to remember and honor the family.”
“My favorite [holiday dish]is the bread of death,” Navarrete shared. “It is a sweet fluffy bread sugar coated on the outside. It is one of the elements used in the altars set to honor the souls during the Day of the Dead celebrations. The bread symbolizes a fraternal offering to the souls and it has many variations in across the Mexican states, urban and rural communities.”
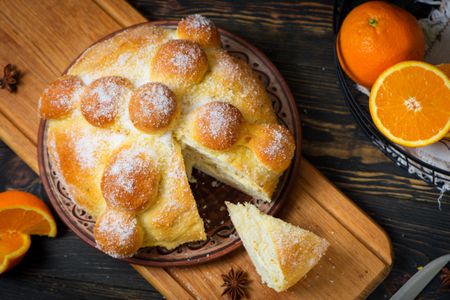
Pan de Muertos (Mexican Bread of the Dread)
Recipe from allrecipes.com: https://www.allrecipes.com/recipe/7224/pan-de-muertos-mexican-bread-of-the-dead/
Bread:
- ¼ cup margarine
- ¼ cup milk
- ¼ cup warm water (110 degrees Fahrenheit)
- 3 cups all-purpose flour
- 1 ¼ teaspoons active dry yeast
- ½ teaspoon salt
- 2 teaspoons anise seed
- ¼ cup white sugar
- 2 eggs, beaten
- 2 teaspoons orange yest
Glaze:
- ¼ cup white sugar
- ¼ cup orange juice
- 1 tablespoon orange zest
- 2 tablespoons white sugar
- Heat the milk and the butter together in a medium saucepan, until the butter melts. Remove from the heat and add them warm water. The mixture should be around 110 degrees F (43 degrees C).
- In a large bowl combine 1 cup of the flour, yeast, salt, anise seed and 1/4 cup of the sugar. Beat in the warm milk mixture then add the eggs and orange zest and beat until well combined. Stir in 1/2 cup of flour and continue adding more flour until the dough is soft.
- Turn the dough out onto a lightly floured surface and knead until smooth and elastic.
- Place the dough into a lightly greased bowl cover with plastic wrap and let rise in a warm place until doubled in size. This will take about 1 to 2 hours. Punch the dough down and shape it into a large round loaf with a round knob on top. Place dough onto a baking sheet, loosely cover with plastic wrap and let rise in a warm place for about 1 hour or until just about doubled in size.
- Bake in a preheated 350 degrees F (175 degrees C) oven for about 35 to 45 minutes. Remove from oven let cool slightly then brush with glaze.
- To make glaze: In a small saucepan combine the 1/4 cup sugar, orange juice and orange zest. Bring to a boil over medium heat and boil for 2 minutes. Brush over top of bread while still warm. Sprinkle glazed bread with white sugar.
Russia:
In Russia, New Years is a major celebration, with Russian Orthodox Christmas following a week after on January 7.
“My favorite celebration is New Year. I think that a lot of Russians would say the same,” said Natalia Kurkova, a 2nd year graduate student working on her MBA, World News Page Editor, and Russian native. “There are grand fireworks on New Year’s Eve. We give our family members and friends presents. Throughout my childhood, my mom would set up a dinner table with a lot of food. We decorated our apartment. We set up a Christmas tree in Mid-December and would have it out until Russian Christmas. Russian TV networks show a lot of New Year-themed shows and movies so having the TV on throughout the celebration is a tradition. Some years, we visited several family members and friends in one night to wish each other a Happy New Year.”
Russia has a number of traditional New Years and Russian Christmas dishes, such as ‘salad olivieh,’ ‘bliny,’ and ‘plov.’ These dishes are infamous throughout Russia as holiday staples for the dinner table.
Kurkova’s favorite dish, traditionally prepared on New Year’s Eve is ‘zapechennaya kuritsa,’ colloquially called baked chicken. “It is similar to how people bake whole turkeys in the U.S.,” she explained. “I love baked chicken because of the seasoning. You can be creative with it. My mom used garlic, parsley, pepper, and mustard powder as the main seasoning ingredients.”
‘Kutia’ is a Christmas pudding and another Russian holiday dish, one that originated in Ukraine and spread to Russia.
“My aunt used to cook this dessert using rice instead of wheat berries,” Kurkova said. “In addition, my aunt added dried cranberries to her ingredients. Each of the ingredients in ‘kutia’ carries meaning in relation to the Orthodox faith, for example, the wheat means eternal life, honey stands for the sweetness of the afterlife, and the nuts and poppy seeds symbolize fertility.”
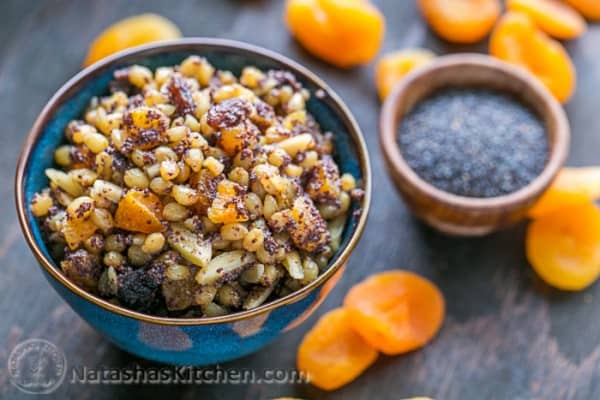
Kutia (Russian Christmas Pudding)
Recipe from tasteatlas.com: https://www.tasteatlas.com/kutia/recipe
- 2 tbsp wheat grains
- 200 g poppy seeds
- 200 g walnuts
- 150 g raisins
- 3 tbsp honey
- Wash the wheat grains thoroughly and let them soak overnight in cold water.
- The next morning, drain and rinse the grains and cook them until tender over low heat, until soft and crumbly.
- Cool the wheat grains and mix them with 1 tbsp of honey.
- Place poppy seeds and raisins in separate bowls and soak them in boiling water for 30 minutes.
- Drain the poppy seeds, add 1 tbsp of honey, and grind them in a blender.
- Fry the nuts until crispy in a small frying pan.
- Drain the raisins.
- Mix the wheat, poppy seeds, and raisins. Add the remaining 1 tbsp of honey. If kutia is too thick, dilute it with some uzvar (dried fruit compote) liquid.
Venezuela:
In Venezuela, the holiday season consists of Christmas and New Year, with Christmas Eve being the most important.
“We make a fancy dinner with all our family members (grandparents, uncles, aunts, cousins, and even friends),” said Daniela Mercades, a freshmen Economics major and Venezuelan. “We have dinner around 10 pm and at 12:00 am kids receive their gifts. They believe that [it]is the Child Jesus that brings them those gifts. … This holiday in Venezuela is really about enjoying time with family celebrating the birth of Jesus Christ. Also, after kids receive their gifts, we usually light fireworks.”
Some traditional Venezuelan dishes include ‘Hallacas’, ‘Pan de Jamon’, pork, and chicken salad.
“Hallacas…consists of corn dough stuffed with a stew of beef, pork, or chicken and other ingredients such as raisins, capers, and olives. They are folded in plantain leaves, tied with strings, and boiled,” Mercades said. “What was everyday food, rich and forceful, was relegated to certain celebrations with religious excuses where the food shortages of the whole year were compensated on December 25 and the New Year with the best that could be put on the table. It is a mix of Spanish and Indigenous culture.”
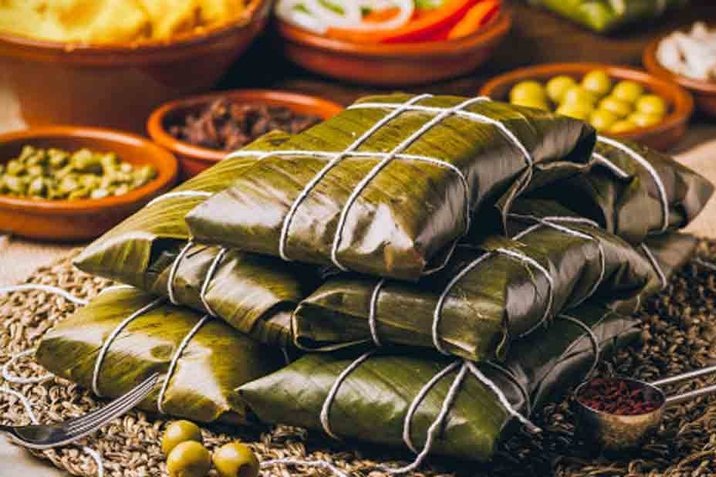
Hallacas (Venezuelan Andean Hallacas)
Recipe from quericavida.com: https://www.quericavida.com/recipes/venezuelan-andean-hallacas/fdcba71c-bac0-437e-8527-d283def35b3e
Filling:
- 4 ½ lbs beef
- 4 ½ lbs pork meat
- 2 ½ lbs bacon
- 2 onions, diced
- 6 sweet peppers, diced
- 2 medium red peppers, diced
- 1 cup green onions, chopped
- 8 garlic cloves, finely chopped
- 1 tablespoon oregano
- 2 tablespoons salt
- 1 tablespoon cumin
- 1 tablespoon powdered garlic
- 1tablespoon ground pepper
- 1 ½ bottle (25.4 oz) red cooking wine
- 12lbs plantain leaves, smoked
- 1 cup vegetable oil
Dough:
- 1 cup pork fat rendering (to cook the annatto)
- 1 cup anatto (achiote)
- 3 packages (2 lbs each) precooked white corn flour
- 15 cups low sodium chicken broth
- 4 ½ cups butter (9 bars), at room temperature
- Salt to taste
Assembly:
- ½ cup vegetable oil
- 4 medium onions, chopped in rings
- 3 red peppers, cut in thin strips
- 4 cups parsley, in sprigs
- 1 ½ cups black raisins
- 2 cups chickpeas, cooked
- ½ cup capers
- 2 cups seedless olives, stuffed with red pepper
- 2 packages bacon, chopped in small chunks (2 inches)
- 1 roll cotton yarn
- Making guiso: Cut the beef, pork and bacon in small pieces. Place everything in a large container or pot, covered with a lid. Add the onion, sweet pepper, green pepper, green onion and garlic. Season with oregano, salt, cumin, powdered garlic, ground pepper, cooking wine and vegetable oil. Mix well and let macerate overnight, preferably in the fridge. Every now and then stir again with a wooden spoon and cover the pot so the flavor concentrates more.
- Preparation and cleaning the leaves: Wash the leaves with water; clean them well with a damp cloth and dry them with a dry one. Divide the leaves in two types: one that’s the main one (the biggest one) which is where you have to place the dough and hallaca filling and the second leaf (smaller one) tha covers, encloses and protects the tamal while is cooking. You should remove the center stem from the leaves, since this prevents them from bending easily. Be careful not to break the leaf while you remove the stem, with the help of scissors.
- Making the dough: Heat up a saucepan at medium heat. Add the pork fat and annatto grains. Let the pork fat dissolve and the annatto to render its color. Remove from the stove and let cool. In a large container, add the corn flour and incorporate little by little with the chicken broth, and the softened butter. Knead vigorously and add the pork fat with annatto and salt to taste. The dough has to be soft and with a yellow color. Divide the dough in 50 equal balls.
- Assembly: Dampen a large leaf with a bit of vegetable oil. Place one ball of dough in the middle of a leaf. Extend the dough in a circular motion with your hands until it is of a 1/4 of an inch thick. Add one tablespoon and a half of guiso with its juice in the center of the dough. On top of the filling, place 2 onion rings, 1 pepper strip, one parsley sprig, 3 raisins, 2 chickpeas, 2 capers, 2 olives and a small piece of bacon.
- Continue folding the leaf. Take the wider edges and attach them upward. Create a fold until it is completely sealed. Fold the other two ends towards the inside and wrap it with the smaller leaf. Tie the hallacas with the previously cut yarn (of approximately 1 meter and a half lenght). Cross them three times in each direction (horizontal and vertical) and close with a knot or bow.
- In a large pot, boil 8 gallons of water at high heat. Place the hallacas, cover, and cook them to low heat for a period of an hour and a half. Repeat the process with the other hallacas or you can use two pots at the same time.
- Remove and drain them, preferably in the vertical position. Let cool and refrigerate until you are ready to eat. Since they take a lot of work, the custom is to prepare large quantities of hallacas. These tamales can be kept in the fridge for up to 4 weeks.
- When you need to heat the hallacas again, boil water in a deep pot at high heat. Add the hallacas you wish to reheat (make sure the water is covering them). Lower the heat to medium and cook for 20 minutes. Remove the pot from the stove. Drain the hallacas, cut the yarn, remove the leaf, and enjoy!
Haiti:
Important holidays in Haiti include November 1 and 2, which, similar to Mexico, are the Days of the Dead. November 18 is also a key holiday, as it is the day where Haitians celebrate the Battle of Vertieres, a historic battle that led to Haiti gaining its independence from French colonizers. However, in Haiti, the most significant holiday comes after the New Year on January 1, which is Haiti’s Independence Day.
“On this day, people all over the country are celebrating the freedom taken with bravery from the French,” said Gethro Florvil, a sophomore Computer Science major and Haitian citizen. “January 2 is the day dedicated to the ancestors who gave us our freedom. …There is a traditional squash soup or pumpkin soup that everyone cooks on that day and share between them to celebrate this victory.”
“This dish means a lot for every Haitian. During colonial times, the slave could not drink this kind of soup, it was only for the colonizers. After taking their independence on January 1st, Haitians all over the country cook this soup and eat together to celebrate this great victory,” Florvil explained. “To make the squash soup or pumpkin soup, boil the squash with water and salt, then blend it. Put spices with carrots, potatoes, yams, chayote, celeries, green peppers, and other vegetables if you want to. When they are ready, add macaroni, spinach, cabbage, and meat.”
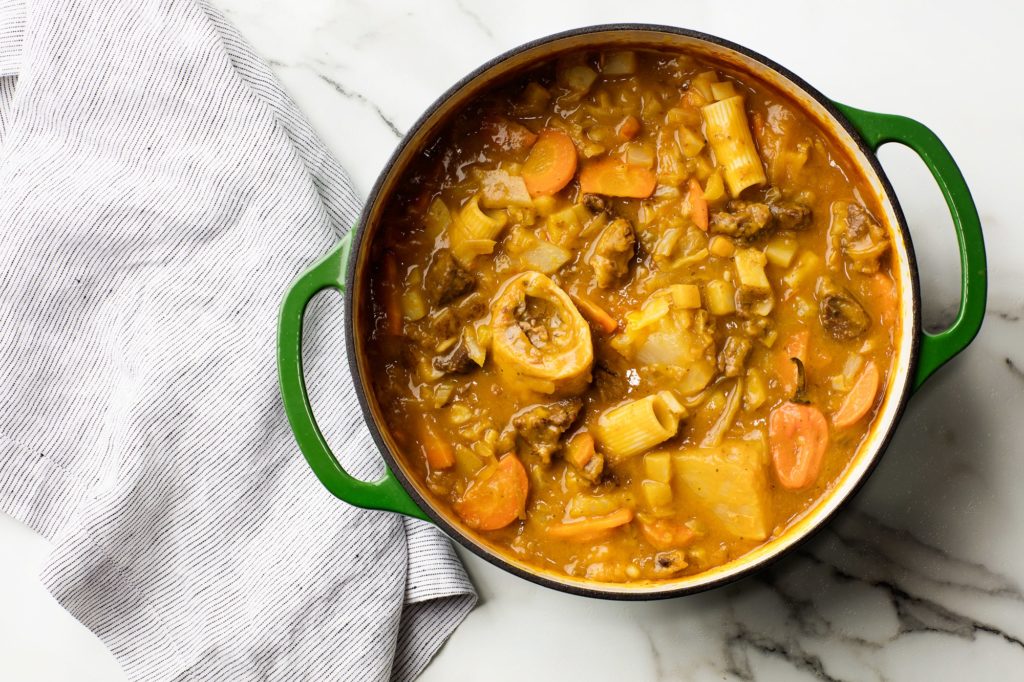
Haitian Beef and Pumpkin Soup (Soup Joumou) Recipe
Recipe from epicurious.com: https://www.epicurious.com/recipes/food/views/haitian-beef-and-pumpkin-soup-soup-joumou
- 1 cup plus 1 tablespoon distilled white vinegar, divided
- 1 pound beef shank, meat cut off bones into 1″ cubes
- 1 pound stew beef (preferably chuck) cut into 1″ cubes
- 1 cup Epis Seasoning Base (https://www.epicurious.com/recipes/food/views/epis-haitian-seasoning-base)
- 3 tablespoons fresh lime juice (from about 1 lime)
- 1 tablespoon seasoned salt
- 15 cups beef or vegetable broth, divided
- 1 pound beef bones
- 1 medium calabaza squash (about 2 pounds), peeled, cubed, or 2 pounds defrosted frozen cubed calabaza squash, or 1 butternut squash (about 2 pounds), peeled, cut into 2″ chunks
- 3 large russet potatoes (about 2 pounds), finely chopped
- 3 carrots (about 1 pound), sliced
- 1/2 small green cabbage (about 1 pound), very thinly sliced
- 1 medium onion, sliced
- 1 celery stalk, coarsely chopped
- 1 leek, white and pale-green parts only, finely chopped
- 2 small turnips, finely chopped
- 1 green Scotch bonnet or habanero chile
- 1 1/2 cups rigatoni
- 6 whole cloves
- 1 teaspoon garlic powder
- 1 teaspoon onion powder
- 2 1/2 teaspoons kosher salt, plus more
- 1/2 teaspoon freshly ground black pepper, plus more
- Pinch of cayenne pepper, plus more
- 1 parsley sprig (optional)
- 1 thyme sprig (optional)
- 2 tablespoons olive oil
- 1 tablespoon unsalted butter
- Crusty bread (for serving)
- A very large stock pot (at least 10 quarts)
- Pour 1 cup vinegar into a large bowl. Swish beef shank and stew beef in vinegar to rinse. Transfer beef to a colander and rinse with water.
- Stir Epis Seasoning Base, lime juice, and seasoned salt in another large bowl. Add beef, toss to coat, and let marinate at least 30 minutes, preferably overnight.
- Heat 5 cups broth in very large stock pot over medium. Add marinated beef and bones, cover, and simmer until meat is beginning to soften, about 40 minutes.
- Add squash to pot on top of beef, cover, and return to a simmer. Cook until squash is fork-tender, 20–25 minutes. Using tongs or a slotted spoon, transfer squash to a blender. Add 4 cups broth and purée until smooth. Return to pot and bring to a simmer.
- Add potatoes, carrots, cabbage, onion, celery, leek, turnips, chile, rigatoni, cloves, garlic powder, onion powder, 2 1/2 tsp. salt, 1/2 tsp. pepper, a pinch of cayenne, parsley, if using, thyme, if using, and remaining 6 cups broth. Simmer, uncovered, until pasta and vegetables are tender, 30–35 minutes.
- Add oil, butter, and remaining 1 Tbsp. vinegar. Reduce heat to medium-low and simmer until beef is very tender, 15–20 minutes more.
- Taste and adjust seasonings. Divide soup among bowls and serve with bread alongside.
- Soup can be made 3 days ahead; cover and chill, or freeze up to 3 months.
Egypt:
“The prophet’s birth is the most significant [holiday in Egypt]because the vibe of the whole country changes, as everyone wants to help each other,” said Farida Hassan, Saint Leo University graduate, former Managing Editor for the paper, and an Egypt native. “There are special treats and sweets..made on this special day in a form of a ‘bride shape’ and we call it ‘Halawet al Moulled.’”
The prophet’s birth, also called ‘Mawlid,’ celebrates the birth of the Prophet Mohamed’s birthday, and the exact date changes each year depending on how Rabi’ al-awwal falls and differences in when the different groups of Muslims choose to observe it. In addition to the prophet’s birth, Egypt also celebrates Christmas and Halloween during the holiday season months.
Traditional holiday dishes in Egypt include ‘Molokheya,’ ‘Dolmas,’ and ‘Fatta.’
“Molokheya is my favorite because [dish]there is no other country [that]makes Molokheya like Egyptians do,” Hassan explained. “It’s a green soup where you can it with bread or rice. It has garlic and a lot of secret spices on it…Arab countries prefer the Egyptian Molokheya the most because it’s different. Other country may eat Molokheya in the form of powder, which I never tried.”
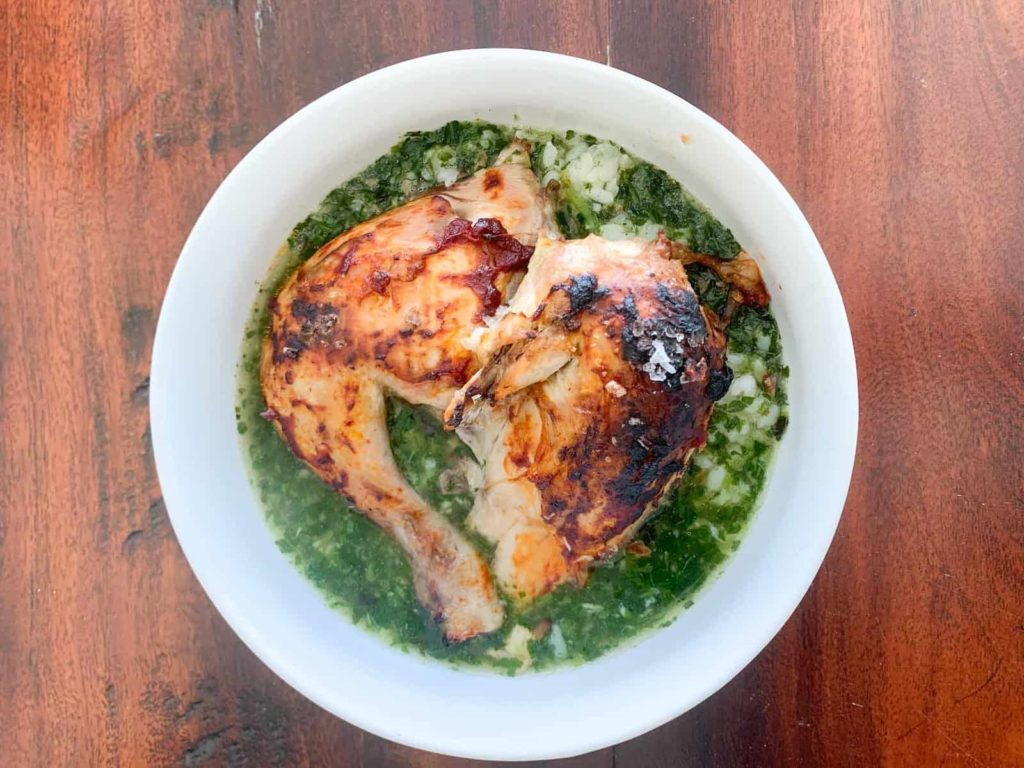
Egyptian Molokhia Soup Recipe
Recipe from homeisakitchen.com: https://homeisakitchen.com/2013/04/25/molokhia-soup-recipe/
- 2 frozen packages (or 800 grams) of diced Molokhia (about 240 calories total) Note: Molokhia also comes as whole leaves (even if frozen). You do not want this unless you are making a different kind of preparation such as a Lebanese or Vietnamese version.
- 6-8 crushed garlic cloves (about 18 – 24 calories)
- 4 cups of chicken broth / chicken flavored vegetable broth / equivalent chicken bullion cubes (about 20 cal.) Note: You can also use beef broth, but only if the beef broth is light and freshly made. I wouldn’t recommend canned beef broth.
- 1 tablespoon of vegetable oil (120 calories)
- 1/2 teaspoon of salt and then add to taste (if you use bullion cubes, they may already be salty enough)
- A pinch of fresh ground black pepper.
- Optional, but recommended: White rice and/or toasted pita bread (about 150 cal. per 1/4 cup of rice or 160 cal. per half a large pita)
- Large pot
- Small frying pan
- Ladle
- Wooden spoon
- Garlic press
- If making rice then a pot for rice
- Cup and tablespoon measurements
- Bring 4 cups of broth to a boil.
- Open up your packages of Molokhia leaves as soon as your broth is about to boil. Do not thaw the leaves ahead of time. That “X” shape isn’t anything special. It’s just how my mother used to open the package quickly with a knife and it’s fun, so I do it too.
- Carefully drop each package of frozen molokhia into the boiling broth.
- Bring the broth back up to a mild boil and then just let it simmer. You do not want to boil this soup very hard. A low simmer is perfect.
- Stir the molokhia every once in a while to really get the molokhia melted (only about 15-20 minutes).
- While that is cooking, make your white rice and/or toast some pita bread in the oven. Set the oven to 325 degrees and place the bread inside right on the rack.
- After a few minutes take out the bread when it has a nice golden brown color to it. Watch it closely because it can go from perfect to flat out burned in seconds. Carefully remove the bread from the racks and let them cool. If you’re not careful, the bread can shatter in your oven and that’s just a huge pain.
- Once the bread has cooled, crumble each large piece into small bite-sized pieces.
- As soon as the molokhia is all melted, let the pot simmer (not boil) for about 5 minutes and then turn off the heat.
- In a small saute pan, heat up a tablespoon of vegetable or olive oil on medium heat.
- Add in 6 crushed cloves of garlic (8 if you really like it garlicky) and saute while stirring frequently until golden brown. Be careful not to burn the garlic! At this point add in the pinch of crushed black pepper to the garlic and saute together.
- Once the garlic is ready, bring the pan over the pot with the Molokhia in it and then ladle some of the Molokhia over the garlic. If you get a satisfying sizzle noise then you’re doing it right.
- Repeat this step so that all of the garlic in the pan is now in the pot. I’m not sure why this is done except that this is how it is done at my house. It’s an easy way to get the garlic out of the pan and mix the soup at the same time.
- That’s it. Molokhia is ready to be served on its own, or over some rice and/or some toasted pita bread. Add salt to taste. If you happened to use chicken flavored bouillon cubes, then it might already be salty enough. If you just used chicken or beef broth then you will definitely need salt. At my house, we each add however much salt we want to our own bowl because we all have different tastes. Serve the Molokhia alongside fried/roasted rabbit, chicken, seafood, or a spinach pie!


